Gluten Free Strawberry Scones

This scones were created by mistake when I was trying to make muffins one day. Best mistake I have ever made! These are perfectly fluffy, moist and laced with sweet strawberries. I bet these would be amazing with any berry you can find. They are also super easy to make, so if you have ever been intimidated to make scones then these babies are for you! Now grab a bowl and get baking, your mouth will thank you.

B3272705-7B5E-4CC6-B0A3-29F514CE6547.jpeg

Gluten-free, sweetened with just a bit of honey, flakey and perfect. You have to make these ASAP. They are my favorite baking mistake I’ve ever made. 

INGREDIENTS:

1 cup fresh strawberries, chopped
2 cups GF flour blend (I used King Arthur Flour)
1/2 teaspoon baking soda
pinch of salt
3 eggs
1 tablespoon melted coconut oil
1 tablespoon melted ghee
Juice of 1/2 lemon (approx. 1 tbsp.)
1 teaspoon vanilla extract
1/4 cup honey

METHOD:

Preheat oven to 325 degrees. Mix the dry ingredients together in a large bowl. Whisk the wet ingredients together in a medium bowl. Combine the wet with the dry using a rubber spatula. Lastly, stir in the strawberries gently. Lightly dust a surface with left over flour. Place the dough on floured surface flipping a few times to coat and then use your hands to shape into a circle. Mine was 9” across and scones are about 1 inch thick. Use a sharp knife to cut into 6 scone wedges (you could also divide the batter twice and make 12 smaller scones). Slightly separate the scones and cook for 20 minutes on a greased baking pan or a silpat on a baking pan. Remove, let cool and dive in! Best enjoyed with more ghee and honey. 

IMG-3799.JPG

72 Hours in Washington D.C. - Weekend Guide

I have never been more excited to write a weekend guide for a city. I am absolutely over the moon about Washington D.C. after returning from a weekend trip with friends. It is such an amazing city, with picturesque views everywhere you turn (and I am not talking national monuments), cool neighborhoods that each have their own charm, an eclectic mix of eateries to suit every craving, friendly locals, and a big score for walkability and getting around on a bike. So let's dive in! If you are heading to D.C. for the weekend, here are my recommendations for how to spend it.   

After our bike ride to Georgetown in the crazy heat + humidity, sweaty and happy!

After our bike ride to Georgetown in the crazy heat + humidity, sweaty and happy!

FRIDAY NIGHT

Explore the neighborhood you are staying in by going for a walk and picking a restaurant close by.  I arrived at 7pm, dropped off my bags in Adams Morgan and heading to Tail Up Goat. Highly recommend if you can get a reservation or don't mind waiting an hour or so.  Plenty of other places to explore nearby while you wait. 

SATURDAY

Wake up, grab a green juice nearby at JRINK then find the nearest Capital Bikeshare and grab a bike! We biked from Adams Morgan to Georgetown using the Rockway Creek Parkway. Most of the route was downhill and absolutely a beautiful ride with lots to see along the way. You can head directly to the Georgetown Waterfront Park to walk around and enjoy the sites, or if you didn't grab a green juice beforehand you can grab a massive smoothie bowl at South Block in Georgetown. If you are hungry for more, head to Shouk for lunch. 

After dropping your bikes off and eating to your hearts delight, take the time to wander around Georgetown, hike up the stone steps that were used in the filming of the exorcist to satisfy your inner 80s child (and also to work those buns, hun). Explore the campus, or if shopping is your thing, head over to M Street to get your fix. 

After taking a much needed rest after all that biking, eating and walking it's time for dinner and more exploring.  Head to Blagden Alley and put your name in as early as you can at The Dabney. This place was the best meal I had while in town. If there is a long wait, head to Calico Cat to enjoy their amazing outdoor patio in the meantime.  If you are looking for a place to go post dinner, grab an amazing craft cocktail at The Columbia Room or a tiki drink at Lost and Found

The Wharf and Navy Yard

The Wharf and Navy Yard

Smoothies and Waffles at Fruitive

Smoothies and Waffles at Fruitive

SUNDAY

Sleep in and head to DC Harvest or Sally's Middle Name for brunch along the H Street Corridor.  Afterwards walk up to the Union Market to walk around, explore and ooh and ahhh at all the goodies. 

After making your morning all about food, head over to the National Museum of African American History and make your afternoon all about culture. If the weather is not crazy hot, join the tourists and walk along the National Mall past the Washington Monument and to the Lincoln Memorial. 

In the evening head to Dupont Circle. Plenty of things happening here and a good time to rest your wallets and explore some of the amazing and healthy fast casual restaurants. Pick between CAVA and The Little Beet for a dose of nourishing ingredients without breaking the bank. You could even take to go if you need to head to the airport. 

MONDAY - BONUS DAY!

I was lucky to visit D.C. for the Labor Day Holiday weekend, so we had an extra day to explore. Head to Fruitive for smoothies and the most amazing GF and Vegan waffle you will ever have. Then head over to the Wharf and Navy Yard to walk around and check out the sites. Need a smoothie or matcha latte? Head to Toastique for some healthy goodness. 

If you have extra time (or if you flew in via BWI airport) head up to Annapolis, Maryland.  This historic town has so much freaking charm! Walk around, explore the sites and check out Fox Books to hang on their patio. Do yourself a favor while you are there and grab a lobster roll at Masons Famous Lobster Rolls. They also offer a massive lobster salad. 

The cutest little town of Annapolis

The cutest little town of Annapolis

Lobster Roll Heaven

Lobster Roll Heaven


Gluten Free + Vegan Curried Stuffed Zucchini

This dish is both vegan and gluten free, AND packed full of protein. I am using Millet which I refer to as a super grain because it has both 10g of protein and 8 g of fiber per half cup serving. I also feel like Millet is the forgotten grain next to its contenders brown rice and quinoa.  So if you are looking to mix it up, this recipe is for you with tasty curried millet with tender zucchini.

CC6B384B-407C-4106-8A0A-F54B07F087A3.jpeg


This recipe turned out legit and was worth the extra time in the kitchen. This is a 30-minute meal and I’m more of a 5-minute meal girl  But sometimes it’s fun to cook and experiment and see what comes of it. I almost forgot how happy cooking a good meal feels, the therapy of chopping and prepping and plating. The magic that your hands can create. I’ve told you all before that July is my month to CREATE. So here is this recipe I created to share with all of you.

INGREDIENTS
Stuffing: 4 large zuchhinis (round or regular) // 1 tablespoon coconut oil or ghee // 1/2 can of white beans // 2 cloves garlic // 1/4 cup cilantro // 1/4 cup dried cranberries (I used @honestlycranberry since they are unsweetened!) // juice of one lemon

Sauce: 1/2 cashew milk or non-dairy milk // 1/2 tablespoon curry powder // salt and pepper // 1.5 cups cooked millet

METHOD
Preheat oven to 350 degrees. Trim edges of the zucchini and scoop out seeds. Save the removed pulp and chop and set aside. Place zucchinis onto a baking sheet or a shallow baking pan and place in the oven while you prepare the stuffing.  

To prepare the sauce, heat oil or ghee in a skillet and add the chopped garlic and zucchini pulp. Cook for 2-3 minutes until juices start to release. Add in the cashew milk, curry powder, cranberries and white beans. Stir in for another 2 minutes. Turn off the heat and add lemon juice. Add cooked millet to the pan and stir to combine with the sauce. 

Take the zucchini out of the oven, spoon in the millet stuffing and place back into the oven and bake for 15-20 minutes covered until the zucchini is tender. Divide onto two plates and enjoy! 

F0DF3C8F-B65D-4B62-B6A9-CF3CF34CE7F2.jpeg
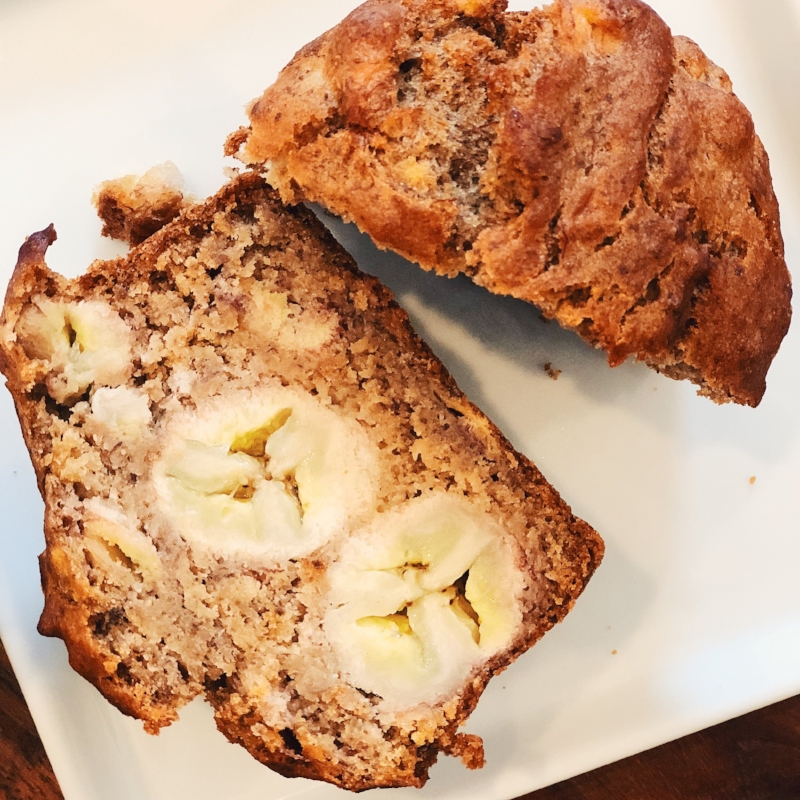
Are Bananas Really A Health Food?

About a year ago, and after much denial, I realized that bananas give me brain fog. The type of brain fog where I find it hard to concentrate with a very “heavy” feeling in my head for much of the day. Brought on by my lingering candida, symptoms like brain fog can creep in with too much sugar in my diet, even from fruit. If by all means possible, this is something that I like to avoid so I have reluctantly cut bananas out of my diet for the most part. This being said, THIS IS WHAT WORKS FOR ME AND MY BODY.

Alongside this personal realization about bananas, I noticed in the wellness community that there is an ongoing debate about whether or not this popular fruit is actually good for you. In the diet community, they are a big no-no.  A fruit that is high in sugar and must be cut out if your goal is weight loss. So much chatter about a piece of fruit, so naturally I wanted to know what was up. What is true and what are some of the myths about bananas.

D23A5FDC-733E-46F2-8DB0-3345C9D712D5.jpg

WHO SHOULD AVOID BANANAS?

If you have been diagnosed with candida albicans then it is best to avoid bananas while you work with a health coach to get your candida symptoms under control. Eating a banana is like opening the windows of a house during a fire, it'll greatly feed the candida. Not only does one banana contain close to 30g of sugar per serving, making it one of the highest sugar fruits there is, but it is also very high in mold content which needs to be avoided at all costs for candida sufferers.

If you have an imbalance in hormones (low thyroid, PCOS, etc.), then bananas should be avoided as well. To get your period back, clear your acne, stop hair loss, and balance your mood and hormone levels, it is wise to keep sugar (as well as dairy and caffeine) out of your diet. But you will also want to take a close look at the other foods and beverages in your diet that might be working against you with your health coach or nutritionist. Bananas will not be the cause of any diagnosis, but taking a break from them (along with other foods) for a short period of time may help with your symptoms.

WILL BANANAS MAKE YOU FAT?

Nope. Bananas will not make you fat. The myth comes from the idea that if you want to lose weight, you need to cut out sugar and bananas are high in sugar.  As I always tell my clients, any highly restrictive dieting should only be as a means to an end for symptoms of a diagnosis, never for weight loss and only for 6-8 weeks maximum so as not to bring imbalance to your microbiome by cutting out certain nutrients.

But here is the thing, bananas are also high in fiber, potassium and magnesium. The high fiber content of bananas and the natural mineral relaxer, magnesium, are a natural remedy to ease and prevent constipation. Bananas can also be great for those who suffer from high blood pressure.   

What we should worry about is not whether a banana will make us fat, but whether or not a banana is actually a health food. Some people claim that bananas are as close at it comes to a genetically modified food due to the fact that the bananas we eat today are a result of cloning to always grow and look and taste a certain way as well as resist disease. Let me explain first by giving you the cliff notes on their history and how they are grown today.

SO MR. BANANA, HOW DID YOU COME TO BE?

When you do the research on bananas you will find that this fruit has a complicated past.  Bananas that we eat today, look totally different from the bananas that we ate 100 years ago.  Up until the 1940s, Americans ate a banana varietal by the name of Gros Michel or “Big Mike.”  Gros Michels were sweet, creamy, and sturdy. You could throw them in a ship's cargo hold and they would show up at their destination, perfectly ripe and unbruised. I mean, I used to put a banana in my purse to snack on at work and within 30 minutes of transport it would emerged bruised and browned. Hmph.

As Big Mike gained popularity around the turn of the century and into the 1920s, these banana crops also suffered from a fungus known as the Panama Disease and by the 1940s it was endangered. In 1947 a new banana called the Cavendish was introduced.  Though the fruit was more delicate (hence the typical purse bruising) and less tasty, it was resistant to Panama disease. Cavendish bananas replaced the Gros Michel as the world's most popular banana by the 1950s. But the Cavendish are sterile, meaning the only way to keep growing them is through cloning. This is the banana that buy and eat today. Only through genetic modification can we create a banana that can resist the fungus.

IS A BANANA JUST A “FACTORY PRODUCT?”

When you think about it, virtually all of the cheap foods we find in the supermarket today — think potatoes, eggs, or ground beef — are the products of finely tuned, highly industrialized agricultural systems geared toward mass production. And, as Dan Koeppel details in his excellent book, Banana: The Fruit That Changed The World, bananas were among the first foods to be turned into a commodity. Fancy that.  And fancy that a man wrote an ENTIRE book about bananas. Now that is dedication. Koeppel goes as far as saying “It's almost wrong to think of the banana as a fruit, as a product of a what we traditionally think of as farm. The Cavendish banana is a factory product in every bit the same way that a potato chip or a BMW is."

So hold up, is a banana just an industrialized fruit?  All those Cavendish bananas also look and taste identical. And that's largely due to the fact that banana plants reproduce asexually.

When a farmer wants a new banana plant, he or she removes a part of an existing plant (either a side shoot, called a "sucker," or an underground root-like structure called a "corm") and puts it in the ground. In time, it will develop into its own genetically identical plant. Without sexual reproduction — a grain of pollen fertilizing an egg, as occurs with most other fruit species — there's no random variation among plants that growers need to worry about. Every banana you've ever eaten is a clone.

This is how virtually all commercially grown bananas are produced worldwide, and it means that every banana plant behaves in the same perfectly predictable manner. Their fruits grow at the same rate, in the same abundance, and ripen at precisely the same time.

ARE WE BANANAS TO EAT BANANAS?

From a nutritional standpoint, bananas are still a cellular food, meaning that they have a low carb density (percent of the food mass that is carbohydrate minus the fiber component). Versus potato chips which are an acelluar food and have a very high carbohydrate density. The carbohydrate density increases as more non-fibrous carbs are packed into a given quantity of food. So even though an author and research such as Koeppel claims that the banana is the same as potato chips he is missing one key fact: nutrients. Bananas are full of fiber, magnesium and potassium.

True you can get adequate amounts of potassium from other foods such as sweet potatoes and avocados without eating a fruit that has been cloned to perfection. And that’s really the bothersome thing here – that we have been eating a cloned fruit for nearly 75 years. One that people have developed allergies and intolerances too as well as one that does have 30g of sugar (fiber or no fiber).

Although we are not bananas to eat bananas, educate yourself on the facts to make a decision that is best for you regarding the foods you choose to have in your diet. In terms of health, yes berries for example will be higher in antioxidants and lower in sugar. But eating bananas every once in a while, is not going to make you fat and surely won’t kill you either. Because let’s face it, a toasted slice of good bread slathered with peanut butter and topped with slice banana and honey is legit the best breakfast or snack ever.

Curious about which types of bread I recommend? Check out My First 3 Healthy Food Swaps plus a worksheet to determine your own!


Easy Detox Salmon Tacos

These salmon tacos have become one of my favorite dishes to make for my 10-day detox, The 10-day balanced gut reset. I even had two friends who bought my reset kick it off by making these tacos for a reset party! These tacos (and a few variations) are a part of my gut reset recipe packet but I thought I would share with you so you can join in on the fun too. 

27A6A301-81BA-4A16-A7F0-E3261E7232F2.jpg

The best thing about these tacos is that they cook up in 10-15 minutes depending on how thick your fish is.  Great option for a quick lunch, or a dinner when you come home from work hangry and want something delicious and healthy.

Detox Salmon Tacos
(Serves 2-3)

Ingredients:
-       One packet Siete Foods Tortillas (any flavor, or corn tortillas if not on my gut reset)
-       1 lime
-       2 tbsp. coconut or avocado oil
-       1 avocado
-       1 pound wild or sustainably farmed salmon*
-       Salt + Pepper

* You can also use cod, red snapper or halibut. 
If you are a vegetarian or want to mix it up, use these ingredients instead of fish:
-       1 can garbanzo beans
-       1 head cauliflower
-       1/2 tsp. turmeric
-       1 tsp. cumin
-       1/4 tsp. chili powder
-       1 lime
-       2 tbsp. olive oil or avocado oil

Cole Slaw:
-       1/2 cup dairy free plain, unsweetened yogurt
-       juice of one lemon or lime
-       handful chopped parsley or cilantro (ok to omit if you don't have)
-       1/2 head of green or purple cabbage
-       salt and pepper

Thinly slice cabbage into ribbons and combine in large bowl with remaining ingredients.  Leftovers will keep in an airtight container for 2 days.

Method:
For fish: Add a generous amount of salt and pepper to fish of choice.  Cook in a cast iron skillet with 1 tablespoon of avocado or coconut oil with skin on flipping once after 4-6 minutes. If your fish is a thicker piece, finish in the over at 350 degrees for 3-5 minutes until cooked through. Or if you are like me, I like my salmon a little pink in the middle. Squeeze with half of lime when done cooking and use the other half for garnish. 
For veggie: Preheat oven to 400 degrees. Combine chickpeas, chopped cauliflower, spices and a glug of oil in a bowl and stir to combine. Pour onto baking sheet into one layer. Roast 20 minutes and flip/stir halfway through with squeeze of half of lime.  Squeeze other half of lime when done roasting.

Serve with Cole Slaw and sliced avocado on tortillas of choice. Happy eating!!

HOW TO EAT FISH RESPONSIBLY
The salmon I used for this recipe is sustainably farmed. As our population grows and salmon becomes a more popular source of Omega 3's, we can't all possibly eat only wild fish or else we would eventually deplete our resources. Contrary to popular belief, you CAN eat farmed fish that is sustainable, safe and good for you!

Be careful when shopping for salmon that has had "color added."  A lot of health food stores, including Whole Foods, don't always carry naturally farmed fish and often add dyes and colors. 

Here are some resources that have helped me when choosing salmon and other fish:
https://www.seafoodwatch.org/seafood-recommendations/groups/salmon
http://www.seafoodwatch.org/
https://sustainablefoodtrust.org/articles/eating-values-five-questions-ask-fishmonger/


Cranberry Orange Bliss Balls

I have to admit, it has been a while since I have taken out my food processor and put it to good use. I was in need of a nutrient dense snack while on the 10-day balanced gut reset that is also low in sugar and high in healthy fats. These Orange Cranberry Bliss balls came to the rescue and came together in 5 minutes. Really, you have no excuse not to make them. 

7CADA29E-1BFA-4432-AFB3-E1C8C39616EC.JPG

I have been really into the orange cranberry combo lately, especially because blood oranges have been in season. You have the option to use a regular orange or a blood orange for this reason. I also recently found unsweetened cranberries on Amazon and have been using them in and on everything. Finally, dried cranberries without all the unnecessary added sugars. 

The great thing about these delicious snack balls is that they are free of nuts (except for coconut), so in case you have any allergies you are in luck.  And if not, no matter, these are amazing and you should make them immediately. Here is how you can DO IT.

↠1 cup unsweetened coconut shreds

↠1 tbsp. each of hemp + ground flax seeds

↠3/4 cup each of raw sunflower and pumpkin seeds

↠3/4 cup coconut butter (soft, not hard)

↠1/4 cup coconut oil, melted

↠3 tbsp. unsweetened dried cranberries

↠juice from 1 blood orange (or regular orange)

↠zest from one blood orange (or regular orange)

↠2 tbsp. raw honey

Place all ingredients in your food processor. Process on high until clumps form. Stop and scrape down the sides if needed. Roll into balls. I was able to make one dozen. Note that if the balls crumble when you try and roll them, place in refrigerator for an hour to chill and then roll. ENJOY!!

How To Build A Buddha Bowl

I have never been to sure about the name "Buddha Bowl," but what I am sure about is that these vegan bowls always give me tons of energy. But really, who gave them this name? Ha ha, I kid I kid. I have been making renditions of my own lately, while on my 10-day Balanced gut reset, and wanted to share the key steps to building the perfect one! You don't have to be a vegan or even a plant lover to dive into one of these rainbow bowls, guaranteed to please the pickiest meat eater (a.k.a. ME!). So grab your biggest bowl and let's get going.

C1715B12-844B-4032-91D4-37BEBE6DB87D.JPG

The only way to make a Buddha Bowl is to start with the biggest bowl you have. You are going to be packing in nutrient dense foods and the more the better. I get asked a lot about serving sizes, so I am going to break it down for you.

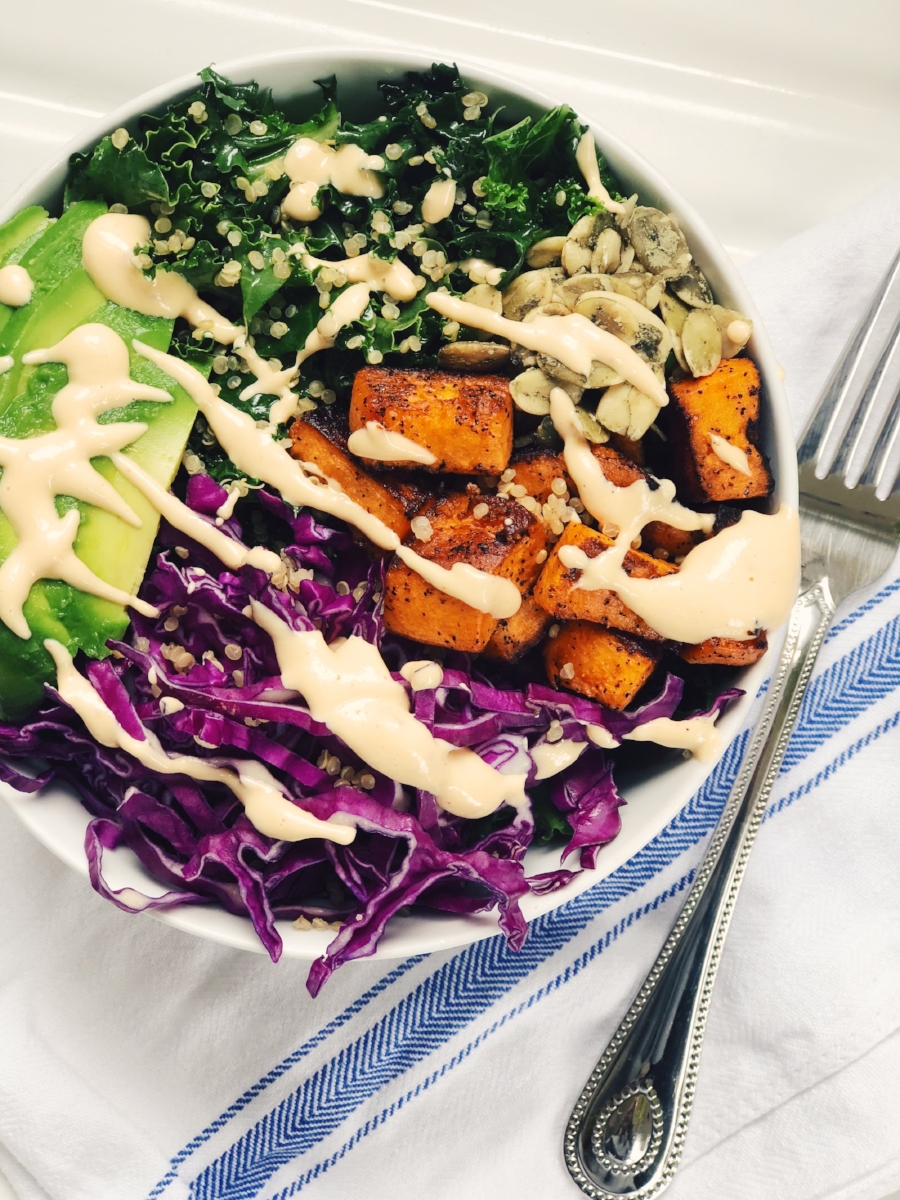
Let's start with the Buddha Bowl pictured above. Here are the five components that are key to making your bowl a stunner. 
BASE: Kale and shredded cabbage: 2 cups total
CARB: 2 tbsp. Quinoa + 1/2 medium Sweet Potato
FAT: 1/4 Avocado + 2 tbsp. pumpkin seeds
PROTEIN: 1/4 Cup Black Beans (added after photo) + Quinoa
SAUCE: Spicy cashew sauce

CREATE YOUR BASE:
A sort of greens will do - spinach, kale, arugula, mixed greens, dandelion greens. For kale, massage with juice from 1/4 of a lemon and splash of olive oil. Rub this "marinade" on the chopped kale with your hands until it start to soften. You can also use grains as your base - brown rice and quinoa are favorites. Recently at Whole Foods I found a blend of brown rice, quinoa, buckwheat and millet that cooks up in 15 minutes. The perfect addition to any Buddha Bowl. 

ADD YOUR CARBS:
When I say carbs, I mean gluten free grains or one of my favorite carbohydrate sources - sweet potato (hey hey paleo people!) Carbs are necessary for energy and can layer them in however you want in your bowl. I sautéed the sweet potatoes pictured here by peeling, chopping into cubes and cooking in olive oil on a cast iron skillet with chili powder, salt and pepper for 8-10 minutes flipping a few times.

ADD YOUR FATS:
I am a HUGE fan of fats. Especially fat sources that are rich in fiber like nuts, seeds and avocado. You can have tons of fun with your fat additions. Here I chose avocado and roasted pumpkin seeds. You could also do sunflower seeds or a sprinkle of hemp seeds.  For nuts, I love roasting up some chopped, almonds, walnuts or hazelnuts.  Cashews would make an amazing addition as well, I just so happened to use them in this bowl for the sauce. Hey yo!

ADD YOUR PROTEIN:
For a Buddha Bowl the trick is to pick a good plant based protein. If you are using beans or lentils, make sure you are adding a grain to get a complete protein (containing all nine essential amino acids). You can also cook up some tofu (non GMO brands I like are Hodo Soy and Wildwood) or fermented tofu, aka tempeh.

GET YOUR SAUCE ON:
This is where the flavor comes in and you have the choice to jazz it up any way that you would like!  For this bowl I wanted something spicy.  I used 1/2 cup of cashews and added 1/3 cup of water, 1/3 cup of olive oil, a squeeze of lemon and 1 tablespoon of sriracha (I like Wild Brine for a sugar and preservative free version). If you like creamy sauces, you can go with a Tahini Sauce - I love this recipe. I also really love adding pesto, Trader Joe's has a great vegan version, or make your own pesto sauce with avocado in it, here is my version that I am obsessed with. 

OTHER TOPPINGS?!
Go for it! Throw some sauerkraut or Kimchi on there for some probiotics. Maybe even some berries, really the sky is the limit to design you own so go for it!!


Colonics: The Good, The Bad and The Poopy

Alright, you asked and I deliver. I am talking everything there is to know about colonics, the benefits, how to prep and why I do them. If you have never done one before and are suffering from digestive issues, constipation, IBS, food allergies, candida, bloat or energy slumps you may want to consider a few colonics sessions after checking in with your naturopathic or functional medicine doctor.

Colonic Room at Body Harmony in SF

Colonic Room at Body Harmony in SF

But wait, hold up… someone puts a tube into my butt emitting warm water into my colon to release any blockages… SAY WHAT?! Does it hurt? Is it safe? Is it uncomfortable? What does it feel like? How do I prep? What should I expect afterwards? How often should I do them?

I am answering all of your questions and why colonics play a very important part in Gut Health and a balanced Microbiome.

THE GUT HEALTH CONNECTION
The most important thing we can do for our health is foster a healthy gut environment where healthy bacteria can grow and thrive. GUT HEALTH = GOOD HEALTH. If we don’t take care of our gut - everything from our colon (large intestine) to our small intestines to our stomach- our physical and mental health suffers as a consequence.

There are two sides of gut dysfunction – 1) Leaky Gut Syndrome and 2) Dysbiosis. In the first, when our gut’s mucosal lining in our small intestine starts to break down and the tight junctions between the cells become permeable, this allows nasty things (partially digested food, bacteria, fungus, etc.) to leak into our blood stream.  The medical community refers to this as Intestinal Barrier Hyper-Permeability and can cause all sorts of immune system responses such as food intolerances, allergies, autoimmune disorders, malabsorption, etc. The second side refers to an imbalance in the gut’s natural flora (our microbiome), which is known as Dysbiosis.

Dysbiosis can lead to chronic infections and once you learn what dysbiotic infections eat, you can start thinking about defeating them. Step one, remove items from your diet that feed any bad bacteria including processed sugars, processed flours and carbohydrates that convert to sugar.

Step two, properly flush your system. Our colon, or large intestine, is 5 to 6 feet in length and is responsible for absorbing water to form stools and eliminate from our body. If we suffer from Dysbiosis it is likely that this will lead to difficulties in proper elimination as studies now show. The intestinal microbiota helps to breakdown food into absorbable nutrients and prevents pathogenic bacteria from growing. When we have an imbalance of bad vs. good bacteria, this doesn’t happen, waste will literally become “stuck” and toxins will continue to build in our colon. 

WHY COLONICS + WHAT ARE THEY
For anyone who has read Love In The Time Of Cholera, (book nerd over here) then you know that enemas have been used for centuries to help with conditions such as constipation and chronic pain. Clean bowels helped patients heal better and faster. These days, we have upgraded to colonics.

Colon Hydrotherapy (aka, colonics) is a safe, effective method of removing waste from the large intestine. Filtered and temperature regulated water is infused into the colon, where waste is softened and loosened, resulting in evacuation through natural peristalsis. The inflow of a small amount of water and the release of waste is repeated several times in the process.

The removal of waste encourages better colon function and elimination. Colonic practitioners use specialized equipment that ensures an easy, odorless, and safe way of eliminating. Colon hydrotherapy is one of the most effective ways of cleansing the lower intestinal tract (colon) and detoxifying the overall system. 

There are both open-system colonics (where you are in the room on your own) as well as closed-system colonics (where the practitioner is in the room and helps to administer abdominal massage to help with release). Personally, I prefer the closed-system approach where the practitioner help to “fill and release.” I promise you it’s not weird, it’s very professional and if you want, you can look at all your waste being released!

Also, nope, colonics do not hurt. When the water is filling your colon you might feel a little pressure in your lower abdomen, and when you are releasing it just feels like you have to go to the bathroom really bad.

 PREPARING FOR A COLONIC
In order to have a successful and comfortable colonic session, prep is important. For at least 2-3 days before your session it is important to:

·      DRINK WATER! Your body needs water to digest your food and to get rid of waste. Drinking half your weight in ounces daily will help to soften you stool. Coffee, soda or flavored drinks do not count.

·      DO A GUT RESET. I recommend colonics to all of my clients who are doing the 10-Day Balanced Gut Reset. By taking daily fiber elimination drinks with psyllium husk on my reset, this further helps if you are particularly constipated.

·      EAT WHOLE FOODS. Make fruits and vegetables 50% of your diet and avoid any gas-producing foods (cruciferous vegetables, beans) and congesting foods (sugar, wheat and dairy). Also, it is very important to not eat or drink anything 2 hours prior to your colonic appointment so food is digested and you are comfortable

·      EAT MINDFULLY. Slowing down to chew your food until it is liquid in your mouth helps immensely with digestion. Although chewing isn’t the only thing that helps digestion, if you are curious about how to practice more mindful eating? Check out my guide of 8 Steps to Eat More Mindfully!

WHY I DO COLONICS, MY FIRST EXPERIENCE AND HOW OFTEN
I recommend going 1 to 3 times for your first round of colonics. When I first started doing colonics I hadn’t even started my wellness journey, and actually, doing my first round of colonics was the catalyst for me choose my path towards better health.  I was 23 when I went to a colonics practitioner for the first time in Huntington Beach. I had just had my gallbladder removed six months earlier and also polyps that were removed from my colon. I had gained weight, had no energy, my skin was having terrible breakouts and I was constipated – only going to the bathroom a few times a week.  My first colonics I did not prepare properly and was only able to eliminate gas bubbles. No waste. I remember feeling defeated, but then I went back for a second and third session within the next 10 days and SUCCESS! I never felt so amazing before. My energy was through the roof, my belly was flat and I was getting the most restful sleep.

Fast forward to today.  Combined with a diet of whole foods and eliminating the abundance of processed foods I ate years ago, I do colonics every six months to a year to keep things clean. I usually do colonics once for up keep (but I recommend 1-3 if this is your first time) and combine it with my balanced gut reset.

For me, colonics are a key piece for maintaining my health.  I notice that if I wait more than a year to go back for a session, I start to feel sluggish, my candida overgrowth starts to creep back in and my BM’s aren’t as fabulous and regular as they usually are. After improving my diet and by integrating cleansing and colonics, I haven’t been on any medications or had any recurring health or gut issues.

If you are reading this (... it's not too late. Thanks Drake) and you are constipated, feel sluggish, struggle with break outs, have bloat, gas or any recurring digestive issues talk to your Naturopathic Doctor or Functional Medicine Doctor about integrating colonics into your health routine.

Why Sourdough Bread is Good for You

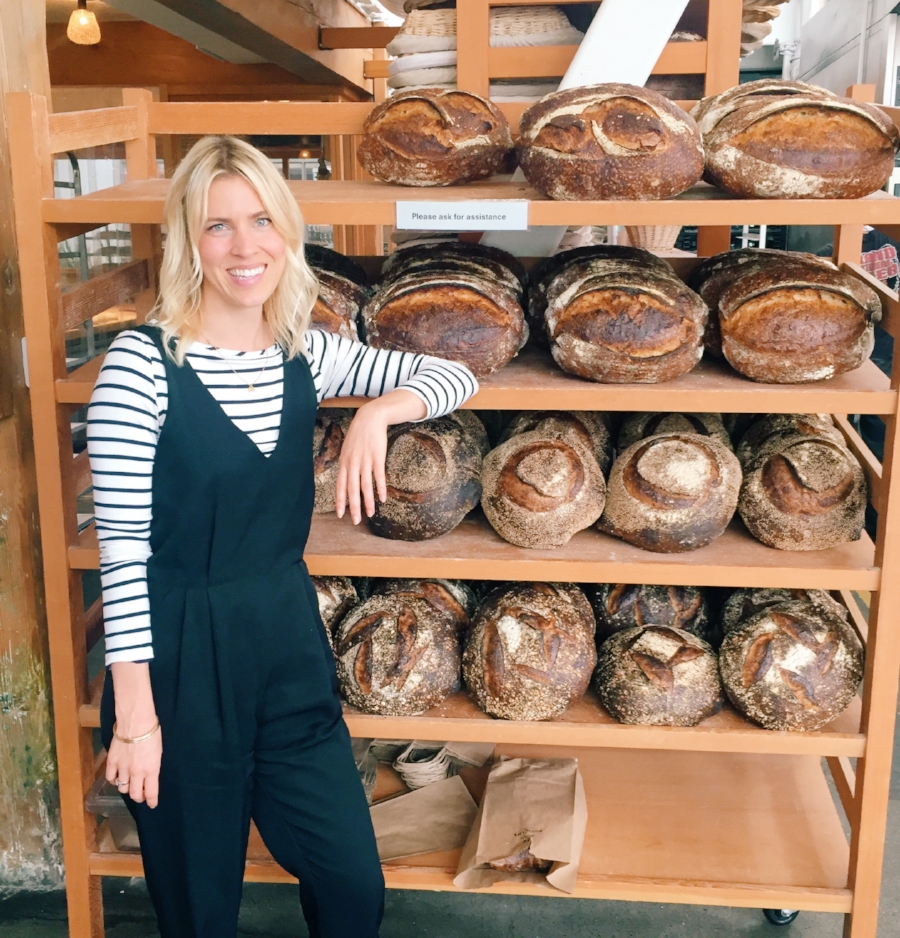
I have always been a big supporter of sourdough bread. Meaning I regularly give money to a baker to provide me with loaves of gluten goodness. But my affinity for fat slices of fresh baked sourdough goes further. I wanted to understand (and therefore researched and read many studies) the biochemical processes that take place during sourdough fermentation. Why does this process make sourdough easy to digest? Why does some bread cause digestive discomfort and bloat? Why is sourdough healthier than ordinary or commercial breads? I'm answering these questions for you because let's face it, if science tells us to eat bread then you EAT THE BREAD. 

BD59ED1D-0A98-48F0-A44F-D0BB13354DAB.JPG

So why is sourdough bread good for you? The magic is in the sourdough fermentation and understanding two key words: Phytic Acid. This process of fermentation transforms the bread, increasing the bioavailability of key nutrients and boosting the nutritional content of the bread. The fermentation process helps to break down phytic acidbut why is that so important? 

Phytic Acid

First you must understand the simple anatomy of a seed and which components are important for digestion and nutrient absorption. All grains start life as whole grains. In their natural state growing in fields, whole grains are the entire seed of a plant. This seed is made up of three key edible parts – the bran, the germ, and the endosperm. There has been a lot of research done on the link of digestive disorders and IBS to bread, indicating that the storage of phosphorus in seeds is found in the bran part of wheat and is called phytic acid.

Screen Shot 2018-04-08 at 9.00.01 AM.png

 This phytic acid inhibits enzymes which are needed for the breakdown of proteins and starch in your stomach. When we lack these enzymes, this results in digestive difficulties (and looking 6 months pregnant after eating bread). This is why commercially processed whole grain bread (whose labels trick us into thinking they are healthy by using the words "whole grain") is often the worst thing that a person with a wheat intolerance should eat.  

A lot of us have been conditioned to believe that any bread that appears white in color must be bad, and bread that appears brown in color must be good. Right? WRONG. Read your labels. Most commercial wheat breads contain dough conditioners, added sugars, preservatives and emulsifiers to bake bread at a faster rate. These additives are also to blame for some people's wheat intolerance. So why is sourdough better than commercially processed wheat breads? The wild yeast and naturally occurring lactobacillus (oh hey probiotic) can neutralize the phytic acid, therefore making it easier to digest. These phytic acid molecules bind with other minerals, just as zinc, iron, magnesium and calcium which makes these important nutrients unavailable to us. 

Give me the nutrients!

Long and slow fermentation of wheat can reduce phytates by up to 90%. In studies, sourdough fermentation versus yeast fermentation showed a more efficient breakdown of phytic acid as well as nutrient availability. Simply put, the phytase enzymes released by the yeast as the dough ferments effectively pre-digests the flour, which releases the micronutrients and in turn reduces bloating and digestive discomfort. To add to that, sourdough bread also takes longer to digest; studies have shown that rye flour added to sourdough can help regulate blood sugar as well.  A total win for bread! Sourdough is also a prebiotic, which helps to support your gut microbiome. There are some incredible studies emerging regarding bread and nutrients, and we are increasingly becoming aware of the links between gut microbial diversity and the association with good health. With evidence based studies, this information becomes more practical in our minds to understand how sourdough can support your health. 

A Balanced Diet

Eating sourdough is just a part of what makes a healthy diet.  Adding more nutrient dense food to your diet, particularly fermented foods such as sourdough bread, makes the nutrient more available and easier to absorb and digest. Many of us believe that bread is the enemy and can cause not only digestive discomfort but also weight gain. What's important is the type of bread that you buy.  Make sure it is from a baker, not commercially processed, and contains minimal indredients (whole wheat flour, sourdough culture and sea salt). Lifestyle, immune system support, blood sugar management, weight management and good digestion are all manageable without cutting out the foods you love. So support your gut microbiome and your health and grab a slice! And as always, listen to your body first over what any study says or what I tell you on here ;)

How to Avoid Airport and Travel Anxiety - PACK LIGHT!

Anxiety and travel is one of the topics I talk about most with my clients. A lot of this is centered around food while traveling, and how to make the right choices. But the other side of anxiety comes with airport travel in general. Getting to the airport on time, getting through security quickly and that awful anxious feeling of whether or not there will be overhead bin space left for your bag. In this post, I am talking how to travel and pack light for any weekend trip to help ease some of your travel anxieties.

CFDE15BF-9512-4D49-93A0-4406316E4EC2.jpg

What you see in the picture aboce is my usual go-to luggage for a weekend trip (3 days, 2 nights). It has saved me from the crushing anxiety of finding overhead bin space and also saves me mula on crazy carry on and bag check fees. 

The bag on my shoulder is a regular Long Champ bag, but I have used other large purses as well measuring 12-14 inches by 18-20 inches. For a recent weekend in LA I brought with me: 2 pairs of pants, one jacket, tennis shoes, slides, 1 pair of yoga pants, 2 sports bras, 1 long sleeve shirt, 3 short sleeve shirts, 1 dressy shirt, 1 tank top, sunglasses, sandals, 1 small purse, toiletries, underwear and socks. On the agenda for the weekend was hiking, yoga, one fancy dinner, casual lunches, walking around and chilling. 

I’ve done weekends in Seattle, Vegas, Portland and even Thailand for 10 days with the same bag (I know, I’m insane but bathing suits and shorts don’t take up too much space!).

So here are my tips. 

1.    Pick a jacket that will go with every outfit that is a neutral color. I packed this Aritzia jacket for my LA trip and wore it on the plane. 

2.    Pants - bring one pair of jeans and one dressier pair or a jumpsuit. I wear my jeans on the plane. I love traveling with a black jumpsuit for its versatility from day to evening.

3.    Activewear - I’m usually fitting in hikes and yoga sessions in my weekend trips. For this I always pack my black yoga pants and two sports bras. I roll these and tuck into any gaps in my shoulder bag. 

4.    Shoes - if you are packing tennis shoes these will take up the majority of your bag without being able to fit other bulky shoes. In this instance, you can wear an easy pair of slides like I have pictured here from madewell (great for day to night with cropped black pants or jumpsuit). Or you can wear your leggings and tennis shoes on the plane and pack your slides plus a pair of heels as well! Sandals are easy to tuck flat in your bag. 

5.    Toiletries - this is key. I bring a small bag that fits deodorant, face moisturizer, toothpaste, toothbrush, mascara, tinted moisturizer, concealer, blush and lipstick. I don’t pack shampoo, conditioner, lotion or body wash. For these items I rely on hotels to provide or friends who I’m staying with.

6.    Buy a cute laptop case (mine is from Society 6) and slide your wallet, phone, headphones and book in there too as your “carry-on” purse. 
 

There you have it! I get a lot of versatility with the mix of items I have listed above. Also, for going up and down escalators to get to terminals in a hurry, you don't have to stand with your luggage, you can walk past every one and up the escalator quickly to get to any connecting flights. Bonus! I will also note that any cold weather travel is much harder with only a large shoulder bag and for these weekend trips I pack more or wear one big jacket onto the plane, layering is key! ;)  Happy traveling for all your fun summer trips!